In Liquid, you can invite Vendors one at a time or by doing a bulk invite for Vendors.
Here’s how to invite a Vendor to Liquid.
Start by logging into Liquid.

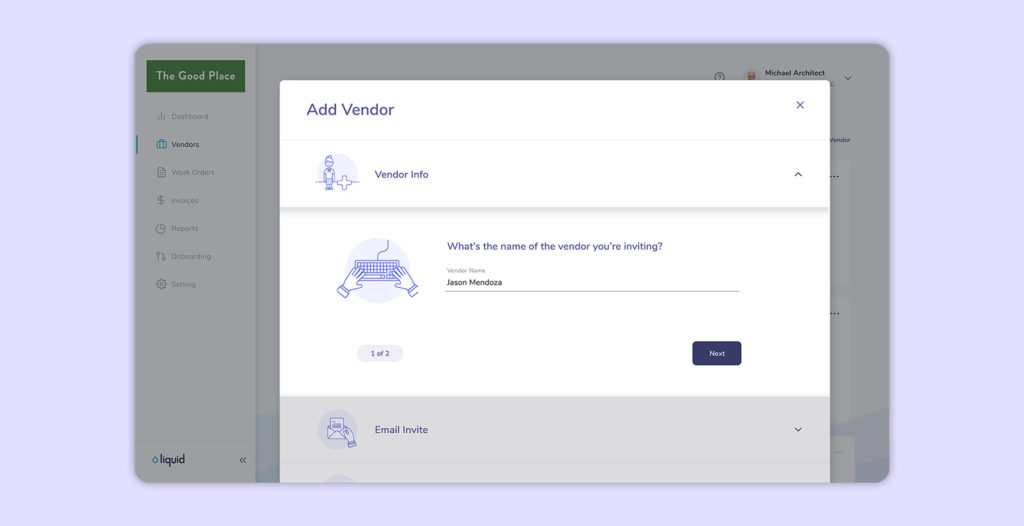
- Once you are logged in, go to Vendors on the left side.
- If you have not invited any Vendors, the Add Vendor form will automatically pop up. If you have already invited a Vendor, you’ll add a new vendor by pressing the + Vendor button to open the Add Vendor form.
- The first step is listing the name of your Vendor. In most cases, you’ll want to list the name of the individual you’ll be inviting. If you know the business name of your Vendor, you could add that in this step instead.
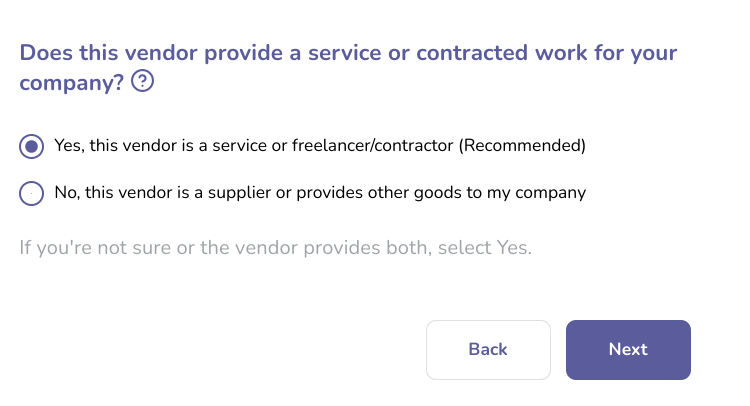
- The next step is to select whether you are inviting a Service Vendor or a non-Service Vendor (a non-Service Vendor is someone who provides only goods). Select Yes, this vendor is a service or freelancers/contractor to move forward with inviting a Service Vendor. If you would like to invite a non-Service Vendor, visit this article to learn those steps.

- Next, add a short description to help you identify the Vendor. You might list their role (graphic designer or front-end software engineer, for example) or you can choose to be more specific.
- Enter the email address for the Vendor you’d like to invite.
- The next field is to personalize the welcome message they will receive from Liquid on your behalf. You can use the existing text, or you can choose to edit to add more detail. Some users choose to include information about why they are switching to Liquid in this field.
- Next, select the Onboarding Process you’d like to use with this Vendor. If you have turned on countersigning, you will be able to turn off Countersigner for this specific Vendor in this step.
- If you select an Offline Contracts process, then you’ll be prompted to upload a copy of your executed master contract as a PDF with a maximum file size of 32 MB. If you select a Standard Onboarding process or a custom process that includes an offline master contract, then you’ll skip this step.
- Then, you will be to select the start and end date of the master contract. By default, the start date is today’s date, and the end date is a year from yesterday.
- Next, you will be asked if you would like to create a Work Order for the invited Vendor. If you select yes, the Add Work Order form will pop up after you press Send. If you select no, you will still be able to invite the Vendor and you will still be able to send a Work Order later to your invited Vendor.
- Before you invite the Vendor, you'll be presented with a summary of the invite. If you'd like to change the Hiring Manager for the Vendor, do so in this step. If you have turned on countersigning, you will be able to change the Countersigner in this step.
- Finally, you’ll press Send to invite the Vendor.
You’ll then be prompted to invite another Vendor.
If you have selected a premium plan, you can also contact support to have your Vendors invited for you.
