We’ll walk you through how Liquid helps you create clear Work Orders, ensuring both parties agree to project deliverables, rates, and expectations.
The steps are to:
- Create a Work Order
- Create a Deliverable
- Describe the Work
- Set the Schedule
- Set the Fee Schedule
- Other section (optional)
- Create additional Deliverables (optional)
- Choose to get Billing Reminders
- Send your Work Order
Create a Work Order
Before you can create a Work Order, you must be fully onboarded to a Client in Liquid. Once you have been onboarded onto a Client in Liquid, select the Work Orders section from the left menu options to begin setting up a new Work Order (WO):
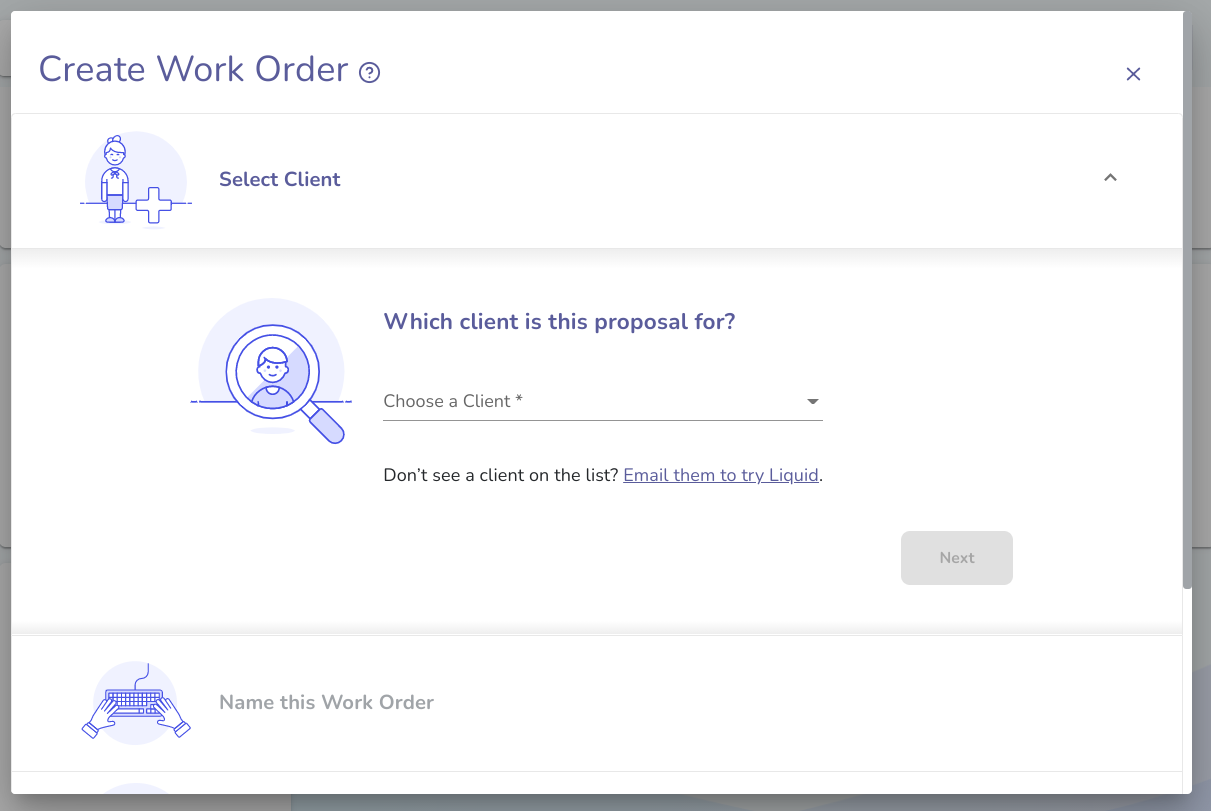
- Click the + Work Order button on the upper-right side.
- You’ll first need to select which Client the Work Order is for. If you don’t see the Client you need, you can click the link below to invite them to set up a Liquid account right from this screen.
- Next, you’ll need to name the Work Order. The name should be short and descriptive, like “Content Writing and Editing.”
Creating Deliverables for your Work Order
Within one Work Order, you can create multiple deliverables, each with their own description, schedule, rate structure, and billing frequency (what we refer to as the Fee Schedule).
Work Order Deliverable: Describe the Work
From here, the Define Services and Deliverables part takes on a Mad Libs style of walking you through the setup for each deliverable.
- Populate the first blank with the title, usually a short phrase that describes the work; for example, “Logo Design: Joe’s Coffee.” Click outside of the text box or hit enter or tab to move on.
- Then, provide a summary of the service or deliverable. We know you might need extra lines, so hitting enter will create a new line, rather than move you on to the next entry field. This summary should be clearly defined; for example, “After reviewing our brand guidelines, and two 1 hour brainstorming sessions, the Vendor shall propose four or more options for Joe’s Coffee’s new logo.” Click outside of the text or press tab once you’ve finished the summary to progress.
- Next, describe the required deliverable or milestone that will define the Work Order as completed. The milestone should be something that can be clearly identified as completed or not completed. For example, you might write “Completed four or more designs for a new logo. The proposed logos are reasonably consistent with the brand guidelines. Each logo should be submitted individually and on a transparent background as an Adobe Illustrator (.ai) file as well as an editable, PDF file, via Dropbox.” As with the previous field, pressing enter will give you more lines, so click out of the box or press tab to move on.
Work Order Deliverable: Set the Schedule
Now that the description of the deliverable is complete, you can set the schedule for the work.
- Begin by selecting the start date of the deliverable.
- You’ll then need to select whether or not the deliverable has a due date. If you select has, the next field will require you to choose a date. If you select does not have, you’ll choose an estimated completion date instead.
Work Order Deliverable: Set the Fee Schedule
The last part required to complete your new WO setup is the fee schedule for the work, which sets the payment frequency and when the vendor may send an invoice.
- In the drop-down menu, choose from the rate options: flat fee to hourly, daily, weekly, 1st and 15th (twice a month), monthly, or quarterly. If none of the choices describes your fee schedule closely, you can choose as follows to describe it in your own words or use Create unit type to create a custom unit type.
- If you select to pay hourly, you can choose whether to set a maximum hour cap or not. You can also choose if the rate should adjust or if the vendor stops all work when they exceed the hour cap.
- You’ll then select when the vendor may send an invoice for their work. If you are paying with a flat fee, you can choose between after we have confirmed receipt of the deliverable or on the specific date of. With quarterly payments, you have the additional option of on the last day of each quarter. Paying monthly allows the quarterly option as well as on the last day of each month. An hourly, daily, or weekly rate allows all of those options listed above as well as every other week on Friday and on the 1st and 15th of each month, on the last day of each month. As with the rates, you can choose as follows and write it out yourself if none of the available options best describes what you need.
For all fee structure options, if "After Receipt" is picked for invoice frequency, you will be reminded to create an invoice after client has marked work order complete if you have enabled invoice reminders.
For all fee structure options, if "As Follows" is picked for invoice frequency, you will not be able to enable invoice reminders.
If you need a $0 rate or are creating a Work Order for reimbursements only, you'll need to select as follows for the rate type and select as follows for the frequency of invoicing.
Work Order Deliverable: Other
In this part, you have some optional opportunities to provide additional context for your vendor. You can provide a total estimated fee for the service or deliverable, as well as any other notes. For example, you may want to include if all invoices should be paid in USD, if the Vendor may bill the Client for invoice processing (ACH/Wire) fees, or any other applicable terms specific to how you operate.
Creating additional Deliverables for your Work Order
To add more deliverables, click on Add another, and go through the same step-by-step process to define the deliverable. Distinctly breaking up a Work Order into several deliverables can be useful for clearly defining when you expect to be complete each task. It also allows for different rates for the range of tasks that can fall within one Work Order. For example, the earlier deliverable example of a 500-word blog post may take a week and will be paid with a flat fee of $100. In contrast, a different deliverable of editing existing written content may take only a few days and have a different rate. It can also be useful for receiving an upfront deposit and additional milestone payments.
Choose to get Billing Reminders
In the final step before sending your Work Order, you can choose to have draft invoices created for you and billing reminders sent to you via email.
Send your Work Order
All that’s left to do now is to send your Work Order to your Client. If one of the deliverable start dates have already passed, you’ll receive a warning message. You can go back and change it, or press Confirm to acknowledge the warning. Press Send to deliver your Work Order. From there, your vendor can choose to accept certain deliverables individually.